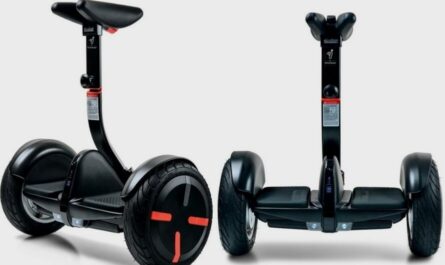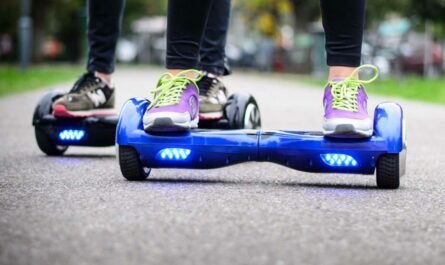
Hoverboards have become increasingly popular in recent years, offering a fun and convenient way to travel short distances. However, like any electronic device, hoverboards require regular charging to keep them running smoothly. Knowing how to properly charge your hoverboard and when it’s fully charged is essential for maintaining its performance. In this article, we’ll explore the various indicators and best practices for charging your hoverboard.
Table of Contents
Understanding the Charging Process
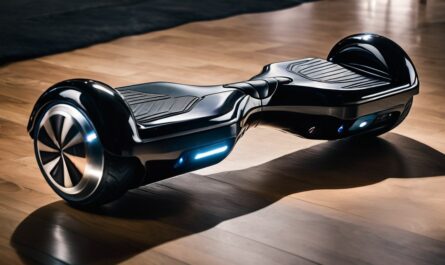
Before we dive into the specifics of how to tell if your hoverboard is charging, it’s important to understand the basics of the charging process. Most hoverboards come with a dedicated charger that plugs into a standard wall outlet. The charger typically has an LED indicator light that changes color to indicate the charging status.
When you plug the charger into your hoverboard, the LED light will usually turn red, indicating that the hoverboard is charging. Once the hoverboard is fully charged, the LED light will turn green. This signals that it’s time to unplug the charger.
It’s crucial to use the original charger that came with your hoverboard or one that is specifically designed for your model. Using an incompatible or low-quality charger can damage your hoverboard’s battery.
Charging Voltage and Current
Hoverboard chargers typically operate at a specific voltage and current to ensure safe and efficient charging. Most hoverboards require a charger with an output of 36V and 2A (amperes). It’s essential to use a charger with the correct specifications to prevent overcharging, undercharging, or damaging the battery.
Overcharging occurs when you continue to charge your hoverboard after it has reached full capacity. This can lead to battery damage, reduced performance, and even safety hazards such as overheating or fire. To avoid these issues, always use the recommended charger and follow the manufacturer’s guidelines for charging time and frequency.
Battery Capacity and Charging Time
The charging time for your hoverboard depends on its battery capacity and the charger’s output. Most hoverboards have lithium-ion batteries with capacities ranging from 4.4Ah to 10Ah (ampere-hours). The higher the battery capacity, the longer the charging time and riding time.
On average, a hoverboard with a 4.4Ah battery may take around 2-3 hours to fully charge, while a 10Ah battery may require up to 5-6 hours. However, these charging times can vary depending on the charger’s output and the initial battery level.

How Do I Know if My Hoverboard is Charging?
1. Hoverboard Indicator Lights
One of the most common ways to tell if your hoverboard is charging is by observing the LED indicator lights on the hoverboard. These lights are typically located on the top or side of the hoverboard and may be labeled with battery icons or percentages.
When you plug in your hoverboard to charge, the LED lights may flash or change color to indicate that the device is charging. For example, some hoverboards have a red light that illuminates when the battery is low and a green light that appears when the battery is fully charged.
It’s important to consult your hoverboard’s user manual to understand the specific meaning of each LED light color and pattern, as they can vary between models. Some common hoverboard LED light indicators include:
- Red light: Battery is low or charging
- Green light: The battery is fully charged
- Flashing red light: Battery is critically low
- Flashing green light: Battery is almost fully charged
- Yellow or orange light: The battery is at a medium level
By familiarizing yourself with your hoverboard’s LED light indicators, you can easily monitor the charging progress and know when your device is ready to ride.
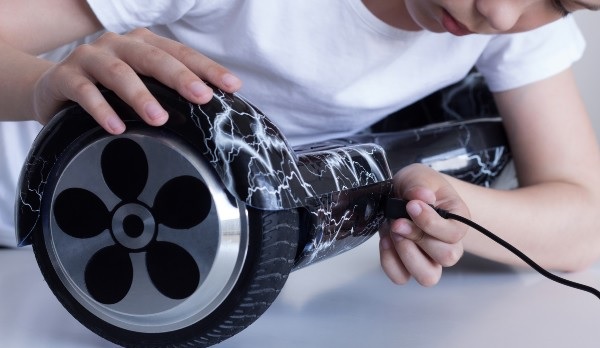
2. Charger Indicator Lights
In addition to the lights on the hoverboard itself, most hoverboard chargers have their own LED indicator lights. These lights provide information about the charger’s connection to the hoverboard and the charging progress.
Typically, when you plug the charger into your hoverboard, the LED light on the charger will turn red. This indicates that the hoverboard is charging. Once the hoverboard is fully charged, the LED light will turn green.
Some chargers may have additional LED light colors or patterns to indicate different charging states or issues, such as:
- No light: The Charger is not properly connected or not receiving power
- Flashing red light: The Charger is detecting an error or safety issue
- Yellow or orange light: Charger is in standby mode or not actively charging
If the LED light on the charger is dim, flickering, or fails to illuminate, it may indicate a problem with the charger or the power supply. In such cases, it’s best to discontinue charging and investigate the issue further.
3. Charging Time
Another way to gauge whether your hoverboard is charging is by keeping track of the charging time. Most hoverboards take between 2-3 hours to fully charge, depending on the model and battery capacity.
It’s essential to allow your hoverboard to charge for the full recommended time to ensure optimal battery performance and longevity. Overcharging your hoverboard can lead to battery damage and potential safety hazards. So it’s crucial to unplug the charger once the LED light turns green or the specified charging time has elapsed.
If you notice that your hoverboard is taking significantly longer to charge than usual, or if the battery drains quickly after a full charge, it may be a sign of a degraded battery. In such cases, it’s best to consult with the manufacturer or a certified technician for further guidance.
Factors Affecting Charging Time
Several factors can influence the charging time of your hoverboard, including:
- Battery capacity: Larger capacity batteries generally take longer to charge than smaller ones.
- Initial battery level: If your hoverboard’s battery is completely drained, it will take longer to charge than if it still has some remaining charge.
- Charger output: Chargers with higher amperage ratings can charge your hoverboard faster than those with lower ratings.
- Ambient temperature: Charging your hoverboard in extremely hot or cold environments can affect the charging time and efficiency.
- Battery age and health: As your hoverboard’s battery ages and undergoes more charge cycles, its capacity and charging efficiency may decrease, resulting in longer charging times.
By understanding these factors, you can better plan your charging schedule and ensure that your hoverboard is ready when you need it.
Troubleshooting Charging Issues
If you encounter any issues while charging your hoverboard, here are some common problems and potential solutions:
1. Red Light Stays On
If the red LED light on your hoverboard or charger stays on even after several hours of charging, it may indicate a problem with the battery or charger. Try using a different charger or outlet to see if the issue persists. If the problem continues, contact the manufacturer or a certified technician for further assistance.
2. No Light On Charger
If the LED light on your charger fails to illuminate when plugged into your hoverboard, it may suggest a faulty charger or a problem with the hoverboard’s charging port. Check the connections and try a different outlet or charger. If the issue remains unresolved, seek professional help.
3. Hoverboard Won’t Turn On After Charging
If your hoverboard doesn’t turn on after a full charge, it may indicate a problem with the battery, motherboard, or other internal components. First, ensure that the power button is functioning correctly and that the connections are secure. If the hoverboard still won’t turn on, contact the manufacturer or repair service for further diagnostics and assistance.
4. Charger Overheating
If you notice that your hoverboard’s charger is becoming excessively hot during the charging process, it may indicate a problem with the charger or the hoverboard’s battery. Immediately unplug the charger and allow it to cool down. If the issue persists, discontinue the use of the charger and contact the manufacturer or a certified technician for guidance.
5. Unusual Noises or Odors During Charging
If you detect any unusual noises, such as hissing or popping sounds, or notice any strange odors coming from your hoverboard or charger during the charging process, it may indicate a serious issue, such as a damaged battery or electrical problem.
In such cases, immediately unplug the charger and contact the manufacturer or a certified technician for assistance. Do not attempt to charge or use the hoverboard until the issue has been resolved.

Tips for Maintaining Your Hoverboard’s Battery Life
1. Charge Regularly
To ensure that your hoverboard is always ready for use, it’s important to charge it regularly, even if you’re not using it frequently. This helps to keep the battery health in good condition and prevents it from fully discharging, which can negatively impact its lifespan.
2. Avoid Overcharging
While it’s important to charge your hoverboard regularly, it’s equally important not to overcharge it. Overcharging can lead to increased heat generation and can cause damage to the battery cells. Once your hoverboard is fully charged, unplug it from the charger to avoid overcharging.
3. Store in a Cool and Dry Place
When you’re not using your hoverboard, it’s important to store it in a cool and dry place. Avoid exposing it to extreme temperatures or storing it in humid environments, as this can affect the battery’s performance and lifespan. A cool and dry place will help to maintain the optimal condition of the battery.
4. Avoid Full Battery Discharge
While it’s not necessary to keep your hoverboard fully charged at all times, it’s also advisable to avoid fully discharging the battery before recharging it. Frequent full discharges can put stress on the battery cells and can lead to decreased battery life. Instead, aim to recharge your hoverboard when the battery level is at around 20-30%.
5. Be Mindful of Charging Time
When you’re charging your hoverboard, it’s important to be mindful of the charging time. Avoid leaving your hoverboard plugged in and charging for an extended period, as this can lead to overcharging and can cause damage to the battery cells. Refer to the manufacturer’s guidelines for the recommended charging time for your specific hoverboard model.
6. Avoid Water Exposure
Hoverboards are not designed to be used in wet or rainy conditions. Water exposure can damage the sensitive electrical components, including the battery. Avoid riding your hoverboard through puddles or in heavy rain. If your hoverboard does get wet, it’s important to dry it thoroughly before attempting to charge it.
7. Regular Maintenance Checks
Regularly inspect your hoverboard for any signs of damage, loose connections, or wear and tear. Pay attention to the charging port and cable, ensuring that they are clean and in good condition. If you notice any issues, such as frayed cables or loose connections, it’s important to address them promptly to prevent further damage to the battery or other components.
When to Seek Professional Help?
While many charging issues can be resolved through basic troubleshooting, some problems may require professional attention. If you experience any of the following, it’s best to seek help from the manufacturer or a certified technician:
- Persistent charging issues that can’t be resolved through troubleshooting
- Visible damage to the hoverboard or charger, such as cracks, frayed wires, or exposed internal components
- Unusual noises, odors, or heat emanating from the hoverboard or charger during charging
- Leaking fluids or signs of battery damage
- Inconsistent battery performance or significantly reduced riding time after a full charge
If your hoverboard experiences charging issues or other problems, it’s important to know your warranty and repair options. Most hoverboard manufacturers offer limited warranties that cover defects in materials and workmanship for a specified period, typically ranging from 6 months to 1 year.
If your hoverboard is still under warranty and experiences a charging issue or other covered problem, contact the manufacturer’s customer support.
Related posts:
 What Is A Hoverboard – When Was The Hoverboard Invented?
  How Much Does Hoverboards Weigh? A Complete Guide
  Are Hoverboards Allowed on Airplanes?Know the Policies
  How Heavy Is a Hoverboard? Choose Right Hoverboard Weights
 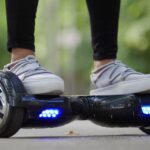 Why Won’t My Hoverboard Turn On After Charging?
 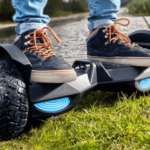 Can Hoverboards Go Uphill? Recommended Brands and Models